Amplifier/ Subwoofer Installation Guide '18- '23 JL Wrangler/ '20- '23 JT Gladiator
Amplifier with/ or without Subwoofer Installation Guide ’18- ’23 Jeep JL Wrangler/ ’20- ’23 Jeep JT Gladiator
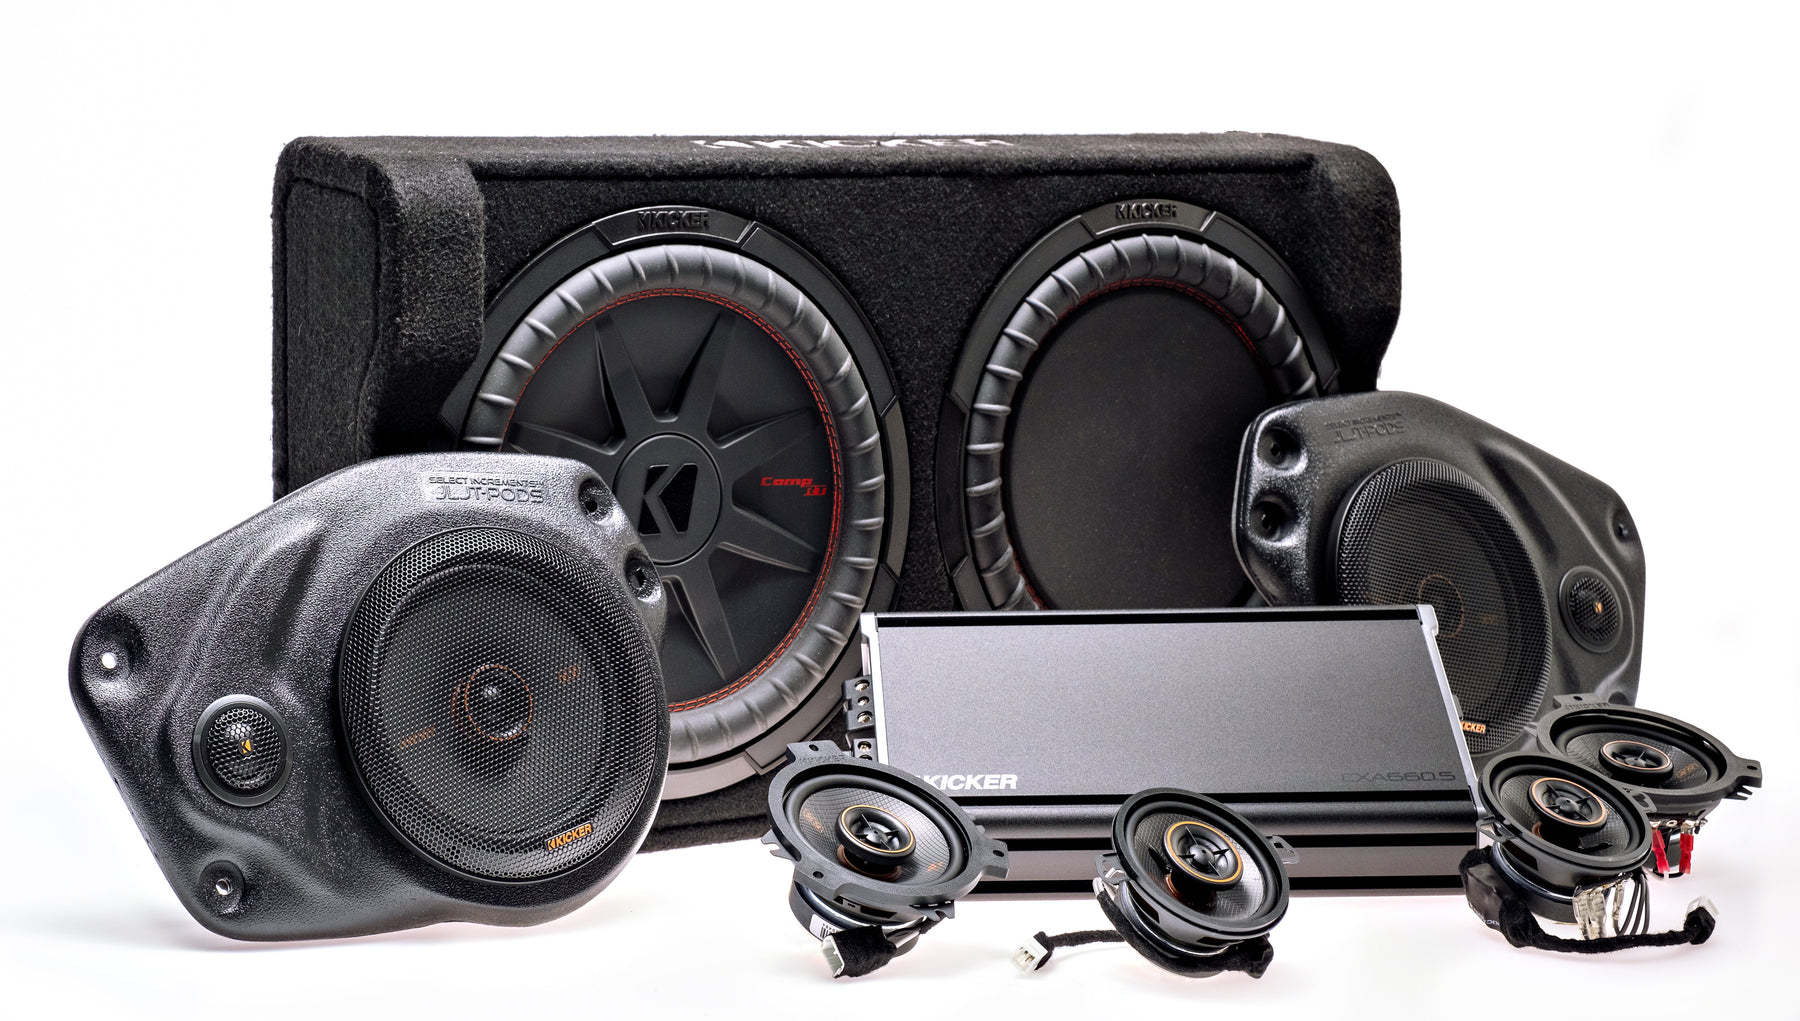
Installation video by Trail Seven, to be used with the written instructions below:
1. Remove Radio-
If connecting to a factory radio, see the PAC module installation instructions covered in step 2. If you’re connecting to an aftermarket radio, you’ll need to expose the RCA’s on the back of the radio or connect the RCA harness to the radio to connect the amplifier to. NOTE: if you’re connecting to an aftermarket radio, and your jeep is non-factory amplified, your 9-wire harness will not have plug and play connectors pre-terminated. You will connect the blue amp on wire (which we’ve connected a pink bullet connector) to the amp on wire at the back of your radio. You will also need to connect the 8 speaker wires which will match up color to color. Be sure to disconnect the speaker wire connector from the head unit so you don’t send the amplifier signal into the head unit. The 9-wire will connect to the wires which will face into the jeep harness which directs to the speakers. We have included 8 pink male and 8 pink female connectors for you to strip and connect the wires with.
3. 4 or 5 Channel Amplifier-
We have fully prepped the amp wires for an easy plug and play installation. All power, ground, remote, and speaker wires have been pre-terminated with fork connectors to easily attach to the appropriate ports on the amplifier. NOTE: proper speaker dedication is referred to as AMP1, AMP2, or SUB on some amplifiers. Amp1 is in reference to the front speakers, Amp2 is in reference to the rear speakers, and Sub is of course the subwoofer.
- Installation location- under driver seat.
- Set amp sideways with the RCA ports and adjustment controls facing towards the door.
- You do not need to remove the seat to complete this installation, however you will need to unbolt all 4 bolts to be able to tilt the seat backwards.
- You will need to pull the trim panel piece underneath the steering wheel off to access the space for wire management.
- The amplifier will not need a mounting bracket (unless one has been provided), as the amp will rest on the carpet. A strip of velcro can be applied to the bottom of the amp which can prevent the amp from sliding around, however once the amp is set and wired, it shouldn’t budge.
- Ground, REM, and Power have all been prepped for an easy connection.
- Ground wire has been prepped with a ferrule connector to slide and fasten into the GROUND port on the amplifier.
- Amp on wire (blue wire), has been prepped with a ferrule connector to slide and fasten into the REM (AMP ON) port on the amplifier.
- Power wire has been prepped with a ferrule connector to slide and fasten into the +12V (POWER) power on the amplifier.
- Speaker wires from 9-wire harness.
- All the wires have been prepped with a split connector which will slide into the appropriate power on the amplifier.
- Follow the diagram below for proper wire termination location.
- The 8 speaker wires will fasten into their dedicated ports and the blue wire will fasten into the REM (AMP ON) power on the left which is between the ground and power port.
- You will route the 9-wire harness along the driver left side trim piece, up the side of the footwell area, up the steering column and over through the center dash to connect to the PAC harness or to the Radio whichever application you are using

- Amplifier bypass harness.
- The amplifier preparation will follow as above.
- The 9-wire with the 2 large connectors will route to the factory amplifier which is located under the steering column on the left side. You will remove the 2 plugs at the bottom of the factory amplifier and connect into the female connectors on the 9-wire. You will then route the blue amp on wire up the column and through the center dash to connect either to an aftermarket radio, or to the PAC module harness.
- RCA’s.
- The RCA’s will connect using the colors White and Red in conjunction with Amp1 (front speakers), Amp2 (rear speakers), and Sub.
- Connect from Amp to the RCA’s on your radio, or on the PAC Module if using a factory radio.
- NOTE: Certain RCA harnesses are directional. In the case when using a directional RCA, you will connect the the ends that point to signal to the amplifier RCA ports.
- Power wire.
- Route power wire from the amp, through the fire wall which is directly behind the driver footwell. You can drill a hole through the plastic cap to route the wire. Refer to our Kicker Powered Down-Firing Subwoofer installation for the power installation method. Link below- Power install section- 27:10- 33:10
- Ground.
- The ground mounting location is directly under the driver seat. You will notice the bolt which has factory grounding cables attached to it. You will remove the bolt and connect the ground wire from the amplifier.
- Adjustments.
- Fader-
- ON
- Input Level-
- LO
- Sub Input-
- SUB
- Amp1, Amp2, and Sub adjustments-
- Gain.
- A good starting position is at 9’oclock. This can be adjusted up or down based on personal preference and music type. It’s best to adjust gain with volume level set to ¾ high and gradually increase the gain. Once you notice the speakers sound distorted, back down the gain slightly. Gain is in relation to volume. The higher the gain, the higher the volume so the less you’ll need to increase the volume on your radio.
- X-over Freq.
- Starting position recommendation is just under 12’oclock.
- Bass Boost.
- Adjustment is based on personal preference.
4. Subwoofer-
- If you are installing a 5-Channel amplifier. The Subwoofer will connect using the provided yellow and black wire. Route the wire underneath the carpet to the sub location and connect with yellow being the positive and black being the negative from the amplifier to the subwoofer.
- The subwoofer will be mounted in the rear of the Jeep using the L brackets which can be screwed down to the rear deck of the Jeep.
- Gladiator sub woofer-
- The subwoofer will mount underneath the rear bench which will require removal of the storage bin if equipped. The bin is held in place with 4 bolts which are easily removed. The subwoofer will then be placed in the middle of the floor space or to which ever side best fits your needs/ wants.
5. Test the system-
- Prior to installing all the trim pieces and the seat, you will want to test the system. You will need to set the radio into the place and install the connections at the bottom trim piece to power on the Jeep.
- A good measure is to start with the amplifier adjustments as recommended above.
- Power on the Jeep and ensure that all speakers and the subwoofer (if installed), are reacting. Now is a good time to adjust the gain further if needed.
- Adjusting gain-
- Lower the gain to 0. Increase the radio volume to 3/4. Slowly increase the gain until the speakers start to distort then back the gain down slightly. Adjust Amp1, Amp2, and Sub gain as needed.
- Bolt seat down, secure radio, replace trim pieces, etc.